So here’s my long overdue hardware review / disassembly “guide” of the Dell Precision M6600… (Thanks, Dell for the exchange upgrade covered under your wonderful warranty!)
DISCLAIMER: I take no responsibility for what you do with your own machine. Also, any “guidance” herein is merely suggestions and is in no way an official disassembly instructions from Dell. When writing this, I assume that you have working knowledge on laptop repair. You’ve been warned.
My apologies if some of these pictures are blurry – I was in a hurry to get my new M6600 up and running so I wasn’t as careful as I could have been to get better quality pictures.
So here are a few pictures comparing the new M6600 series with the old M6400/6500 chassis:
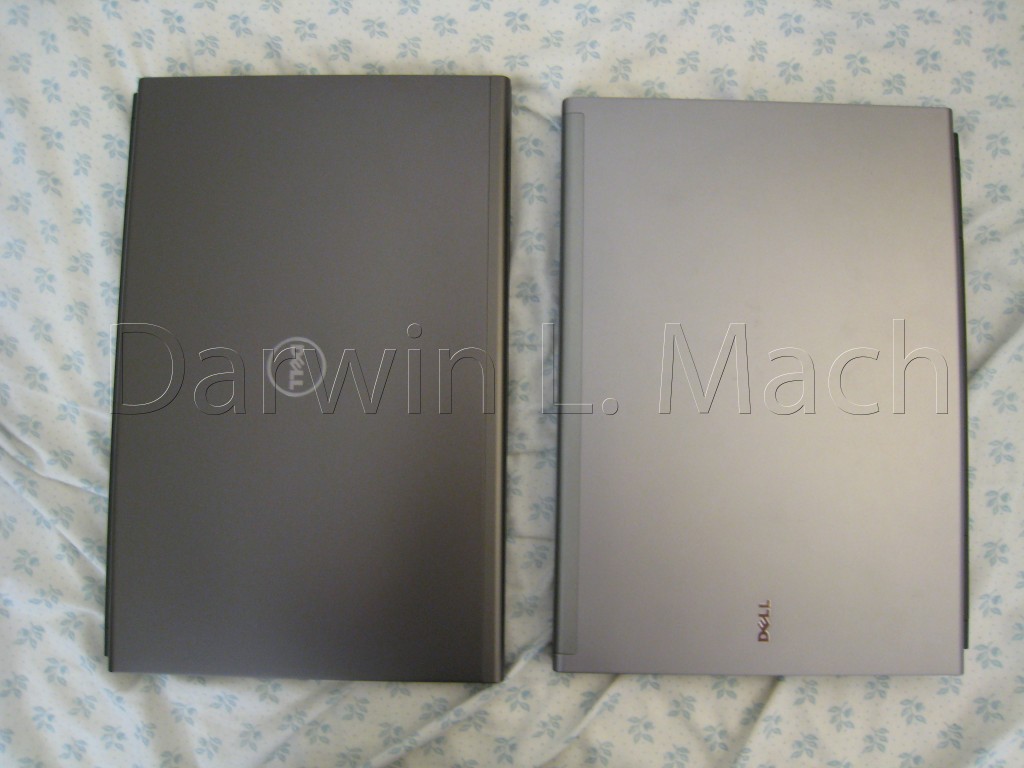
This one is a picture of the two systems side by side (M6600 on the left). Visually, you can tell that the new series is longer and thinner than it’s older series. This is mainly because of the change in aspect ratio from about 16:10 to the HD “Standard” of 16:9.


As you can see from the two pictures above, the ports on the left side of the Precisions have been distributed more evenly to make better use of space. This also allows for fatter USB devices to be plugged directly into the system.


The right side of the Precisions have also changed. The Express Card (EC) slot has moved over to the left side and there is no longer a PC card slot (It’s also worth noting that the new EC slot is spring loaded, contrary to the one in the M6400). The VGA, ethernet, and now dedicated eSATA port have moved to the back. In its place are 2 USB 3.0 ports. The wireless switch is also moved closer to the front, but the DisplayPort is still in the same location


Here you can see the M6600’s VGA, ethernet, and dedicated eSATA port on the rear of the machine. Dell also added an HDMI port and moved the power input to the left, back side of the machine.
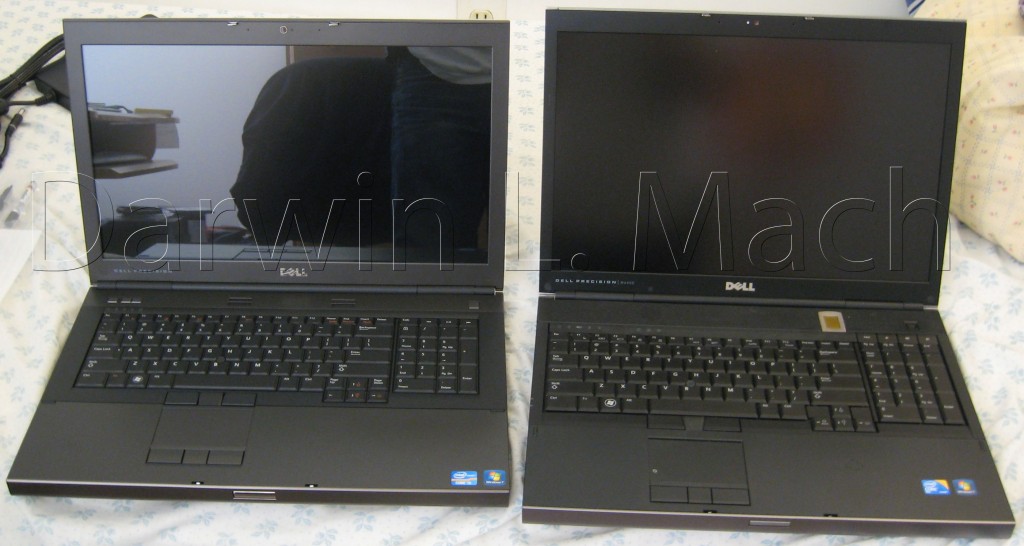
Here’s a picture of the two laptops side by side , opened to show you their full glory (M6600 on the left). The two systems have a different keyboard layout. Most notably the volume controls have moved to the top left of the palmrest assembly as silver buttons that are flat, click, and are harder to press. The “Page Up”, “Page Down”, “Home”, and “Del” keys have been relocated and in their place, 3 media keys are now present (Back, Play/Pause, Forward). The convenient calculator key has just moved down and is the same spot. The speaker grill on the M6600 is also clearly visible. Although it can’t be clearly seen in the photo, the M6600 no longer has a fully “perforated” top cover (where the speaker bar is), which traps less dust. Also not shown on the M6600 is the FIPS fingerprint reader, which is exactly the same as the M6400, but in lower right hand corner just above the Windows 7 logo sticker. The M6600’s screen is gloss finished because this model has a multi-touch panel built in.
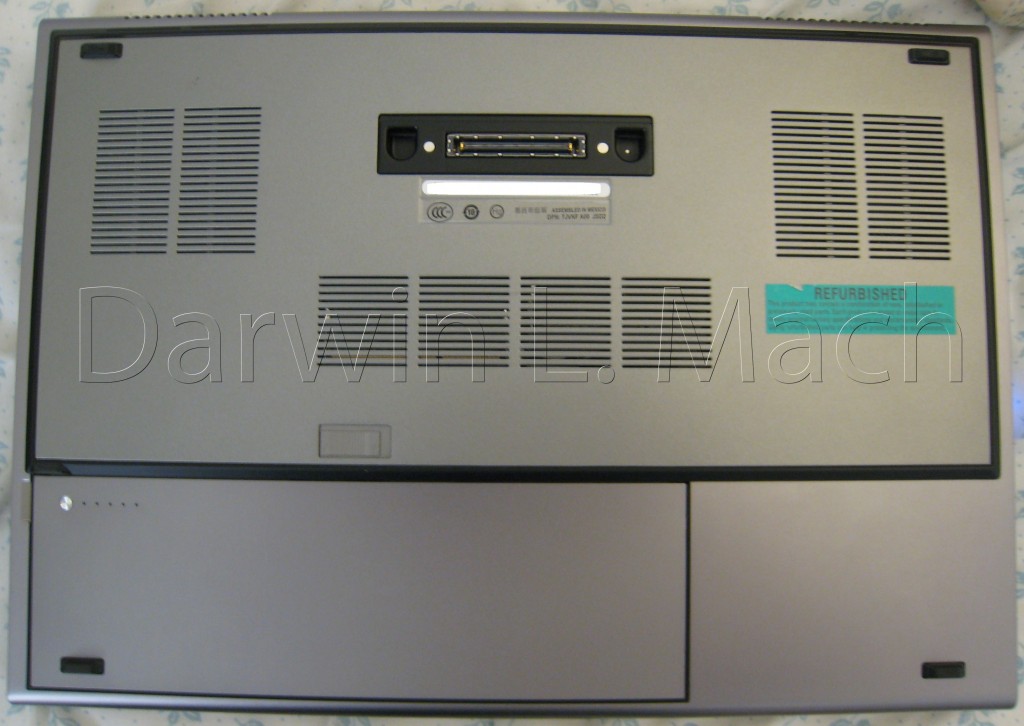
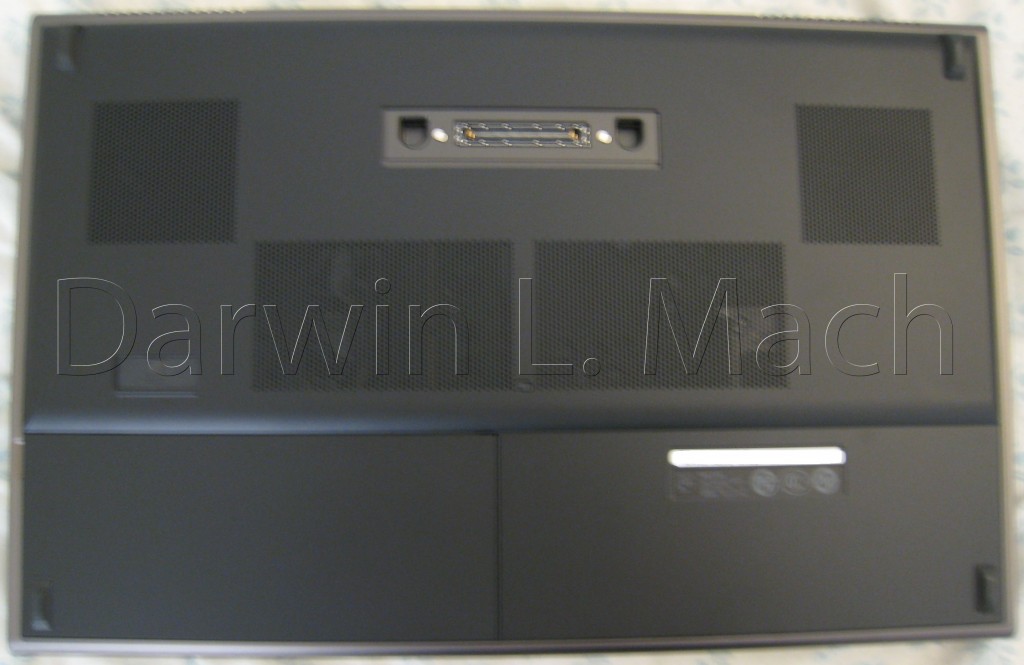
The bottom cover of the two systems are much different as well, save for the docking connector, which is the same (and also compatible with any E-family dock).
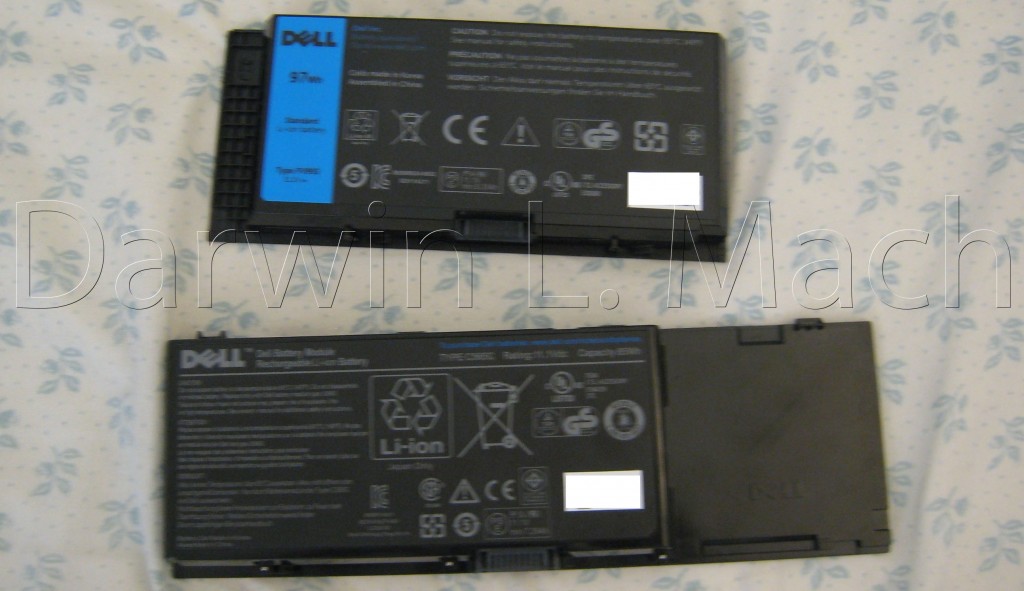
The M6600’s battery is much smaller than M6400’s battery, but ONLY due to a reduction in the extra plastic size. Otherwise they’re pretty much the same in physical size and charge capacity (97 vs 95 W-Hr).
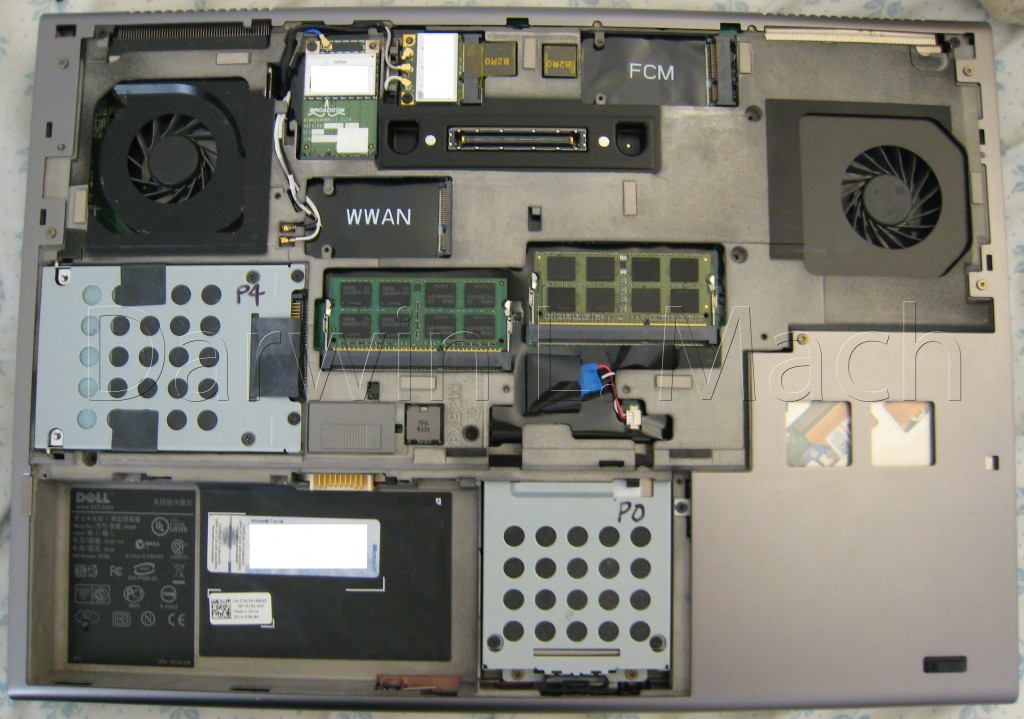
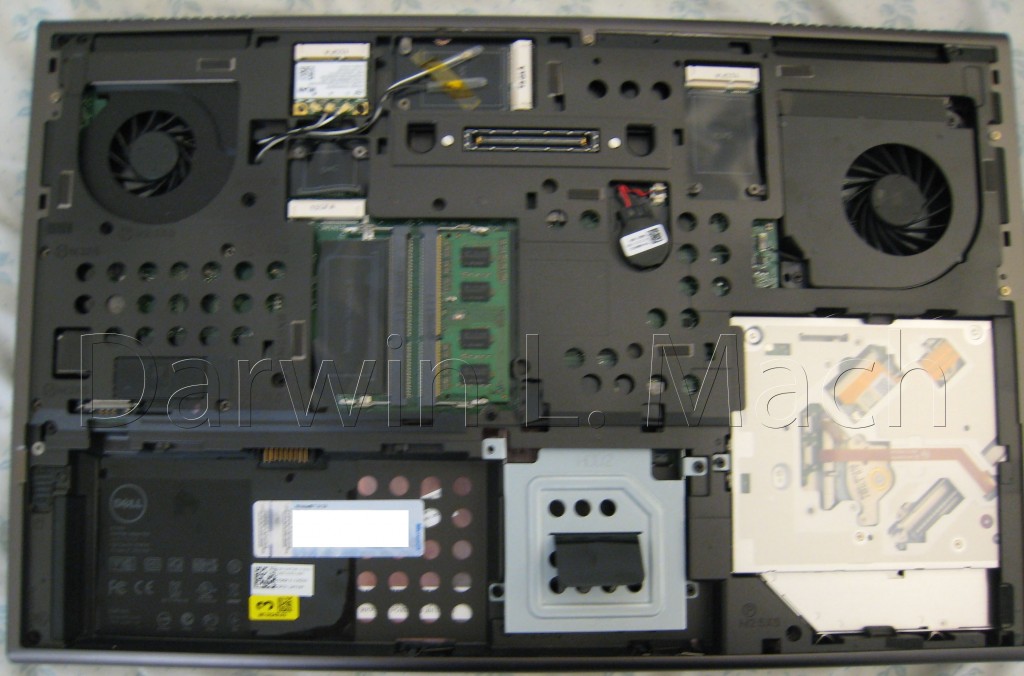
The interior of the M6600’s bottom is also different (of course). Unlike before, the primary hard disk is not directly removable from the bottom. The two “user replaceable” RAM is also accessible from the bottom. Two more are underneath the keyboard, which will require a partial disassembly to reach.
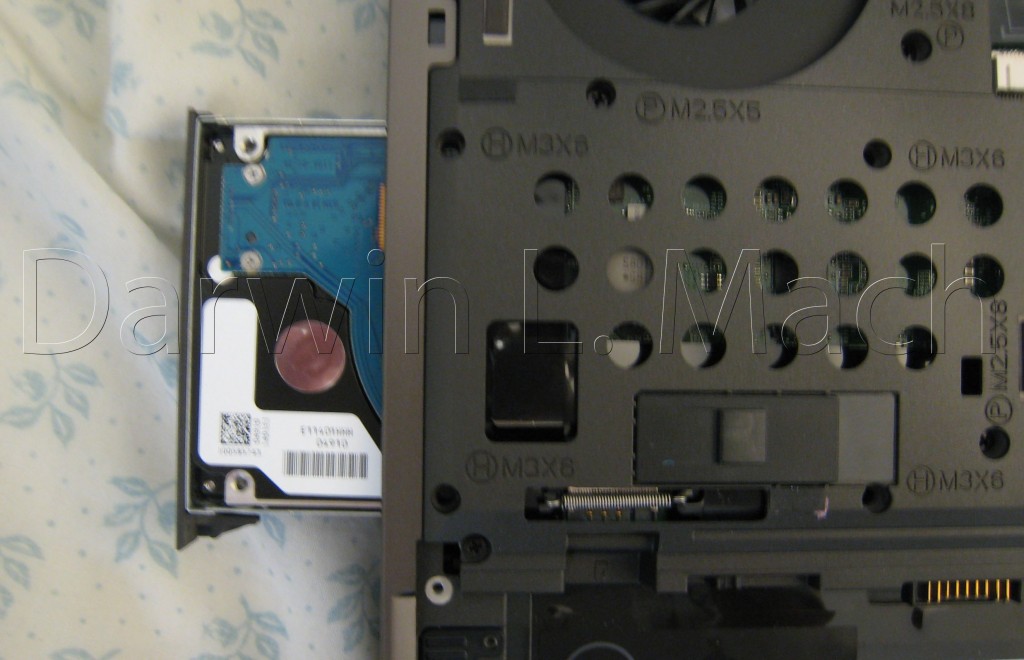
To remove the primary hard disk, you have to remove the “H” screws and push the release tab in the battery compartment to release it.
Now we’re going to discuss accessing and replacing the major components on the M6600. IMPORTANT NOTE: Some details are omitted because I’m writing this from the re-assembled system.
First, you need to remove all the “P” labeled screws plus a few unlabeled screws: 2 next to the primary hard drive and a few more I don’t remember exactly where (probably 2 near the screen hinges and one under the optical drive, don’t quote me on it). You’ll only need to remove these screws if you’re going to access anything BEYOND the keyboard and the “internal” memory slots.
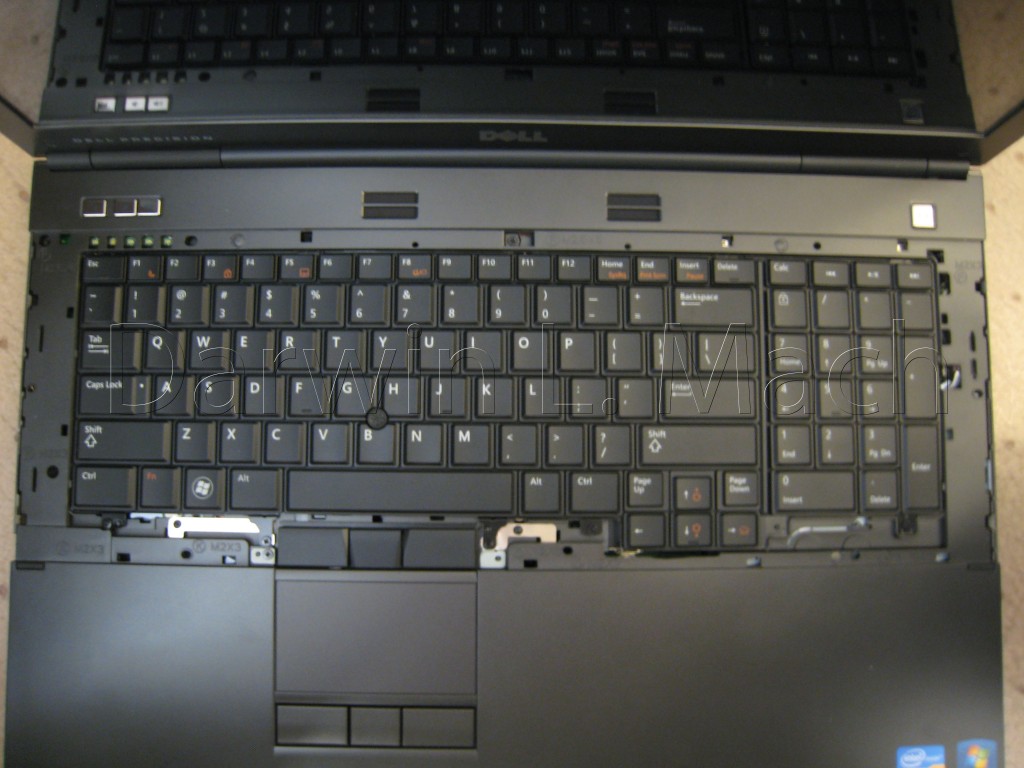
The first step is to remove the plastic keyboard cover that surrounds the entire keyboard. You’ll need to start at the edges and use a plastic card to carefully pop it up. Hint: it’s very fragile.
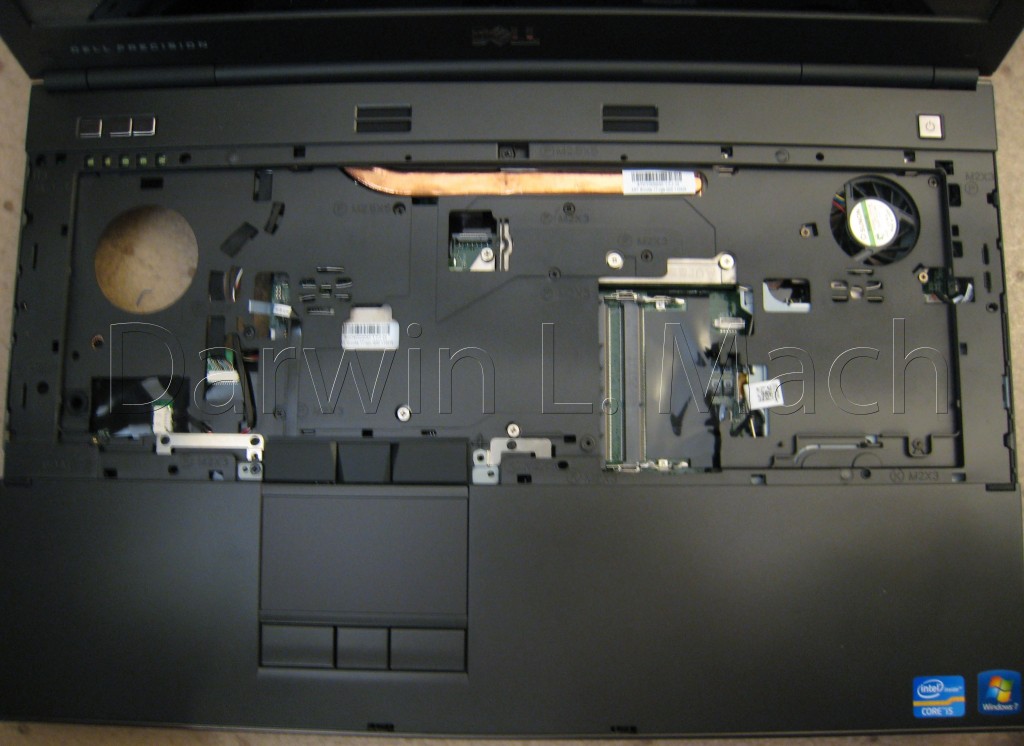
After removing the keyboard (5 screws, “K”), the “non-replaceable” memory memory slots can be accessed. Because of an Intel Sandy Brigde CPU limitation, you must have a quad Core-i7 CPU in order to use these two RAM slots. This is because each 2 cores has its own memory controller that only supports 2 slots of memory.
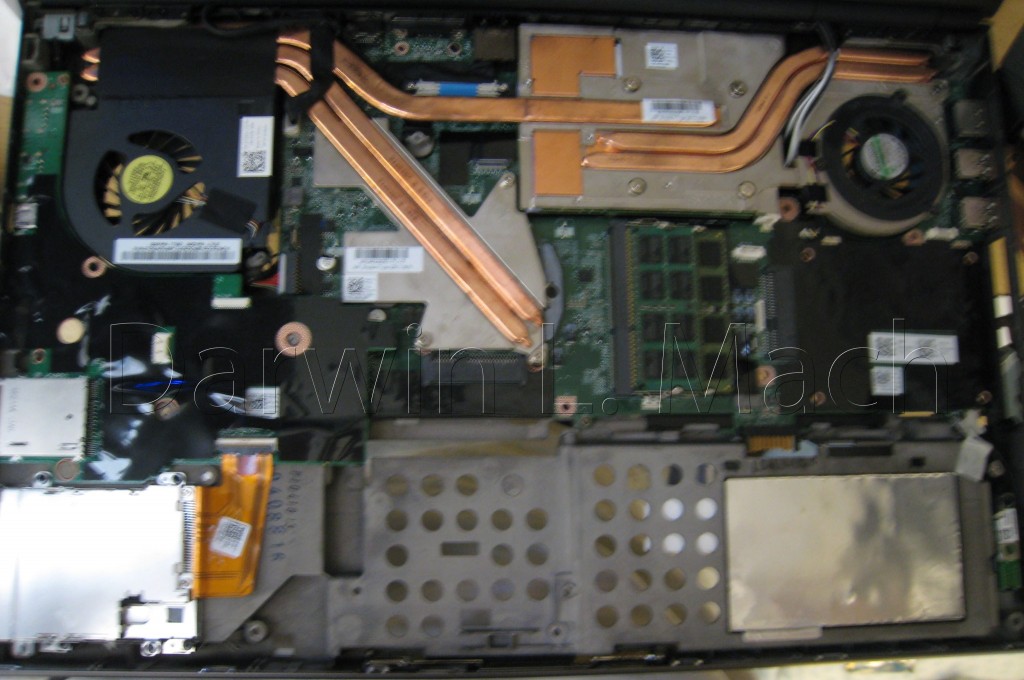
Remove all the remaining “P” screws & use a plastic card at the edge of the chassis to remove the palm rest assembly. Three of these screws are self-retaining. Of course, disconnect all visible cables. If so equipped, there’s a Bluetooth cable you won’t be able to unplug until you get the palm rest removed, so be careful.
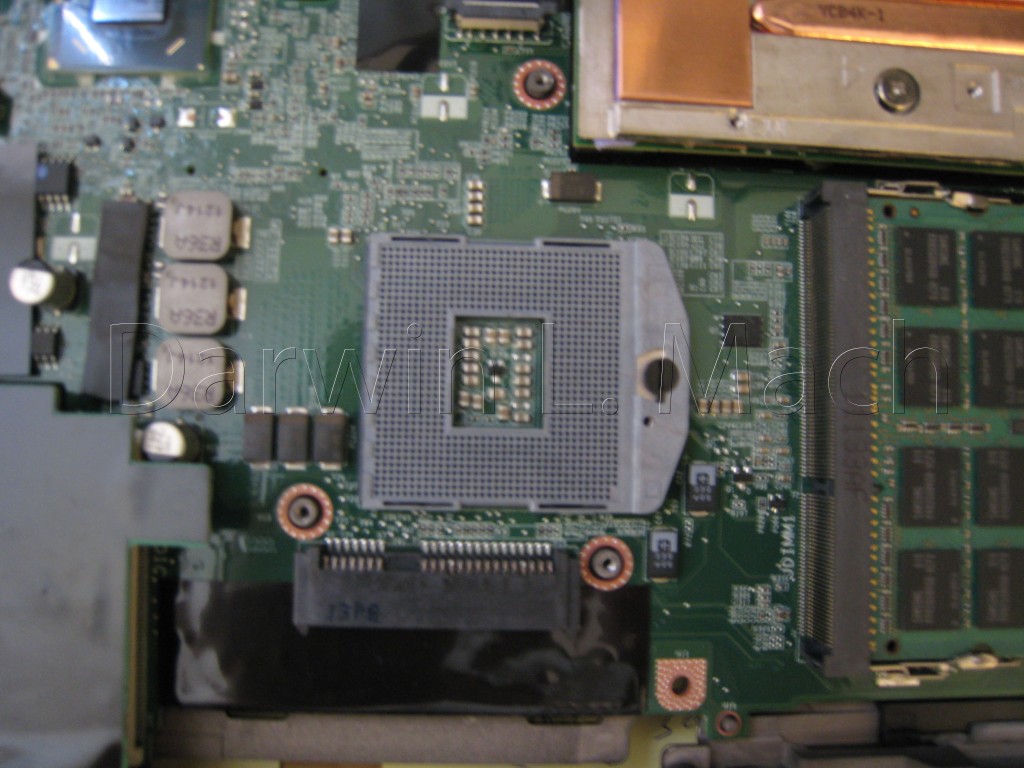
Here’s a closeup shot of the CPU socket. Is is compatible with any Socket G1/G2 Sandy Bridge CPU. Personally, I replaced my Core-i5 with a Core-i7 2820QM (and subsequently enabling the “internal” memory slots). Unlike the previous Precision laptops, there is only 1 daughter board. Additionally, unlike the M6500 series, there is only 1 motherboard that supports both Dual and Quad core CPUs.
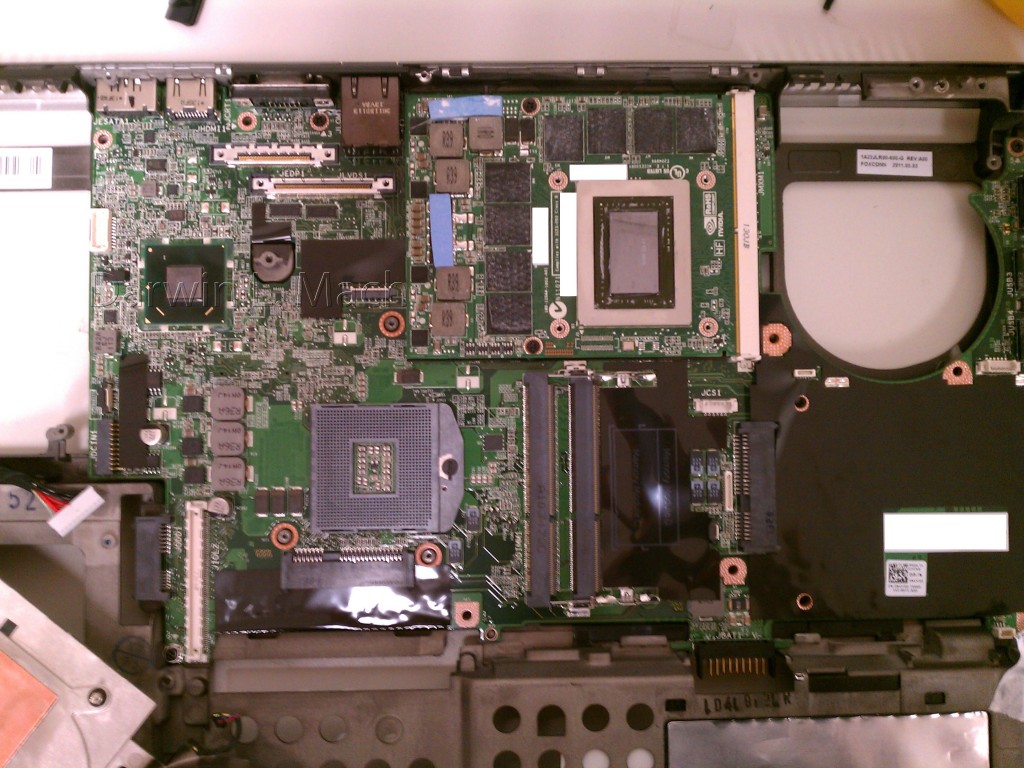
Removing any other components from this point on requires that the display be removed. The procedure is the same as the M6400. Here is a picture of the GPU (upper middle card) with the GPU heat sink removed. The GPU is an MXM card.
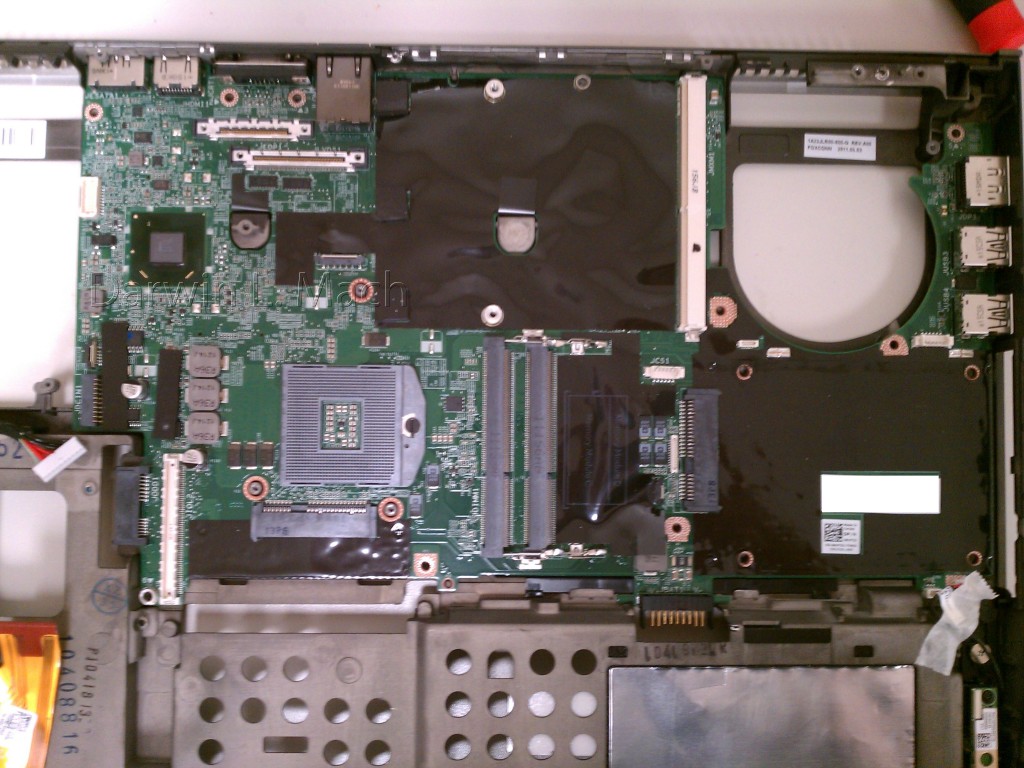
Here’s a picture of the main board without the GPU card.
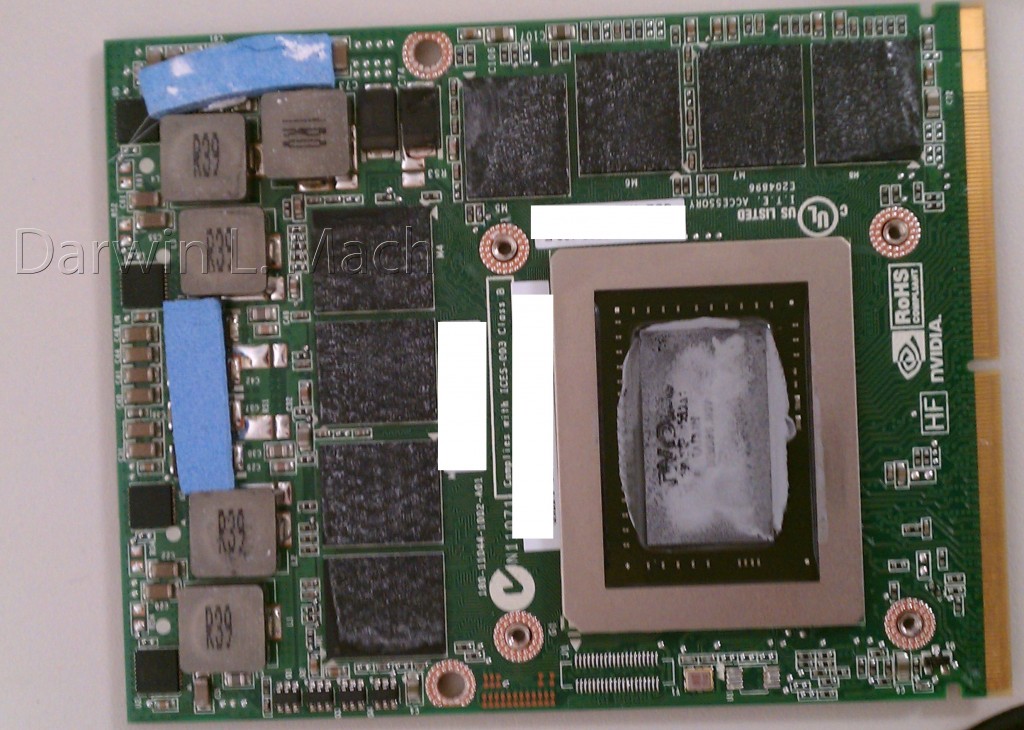
Here’s a picture of the GPU by itself. This one is the nVidia Quadro 4000M.
To re-assemble, just go backwards. Make sure you keep track of your screws 😀
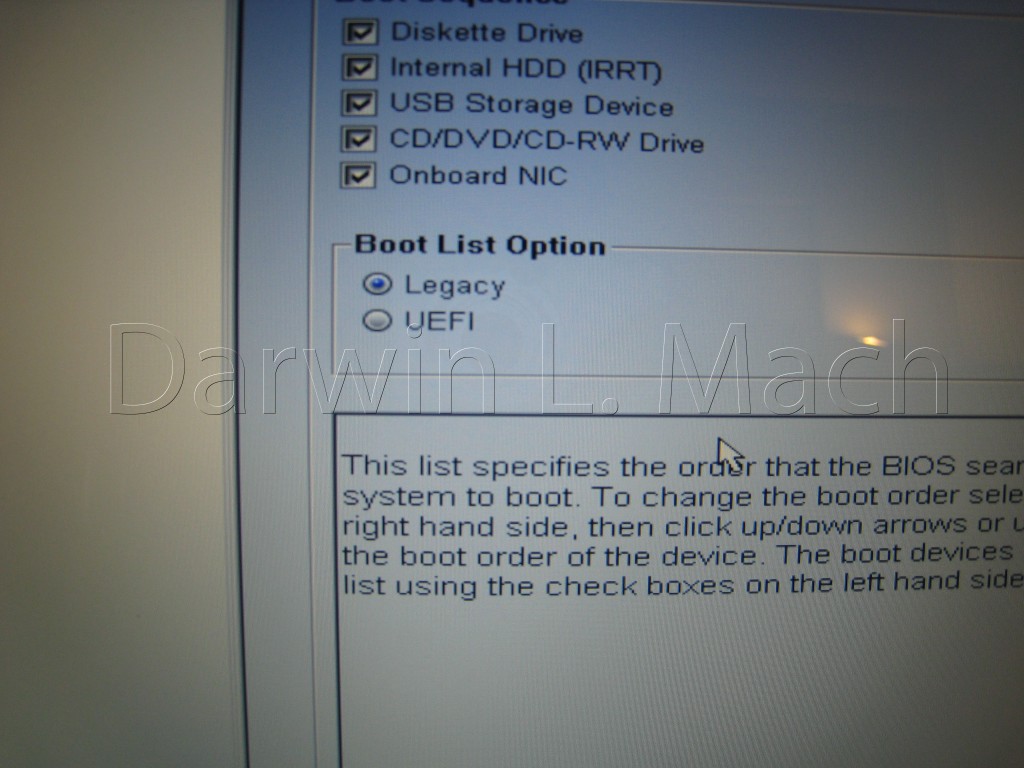
This picture shows the M6600 “BIOS” (firmware to be correct) screen with the option for uEFI boot.
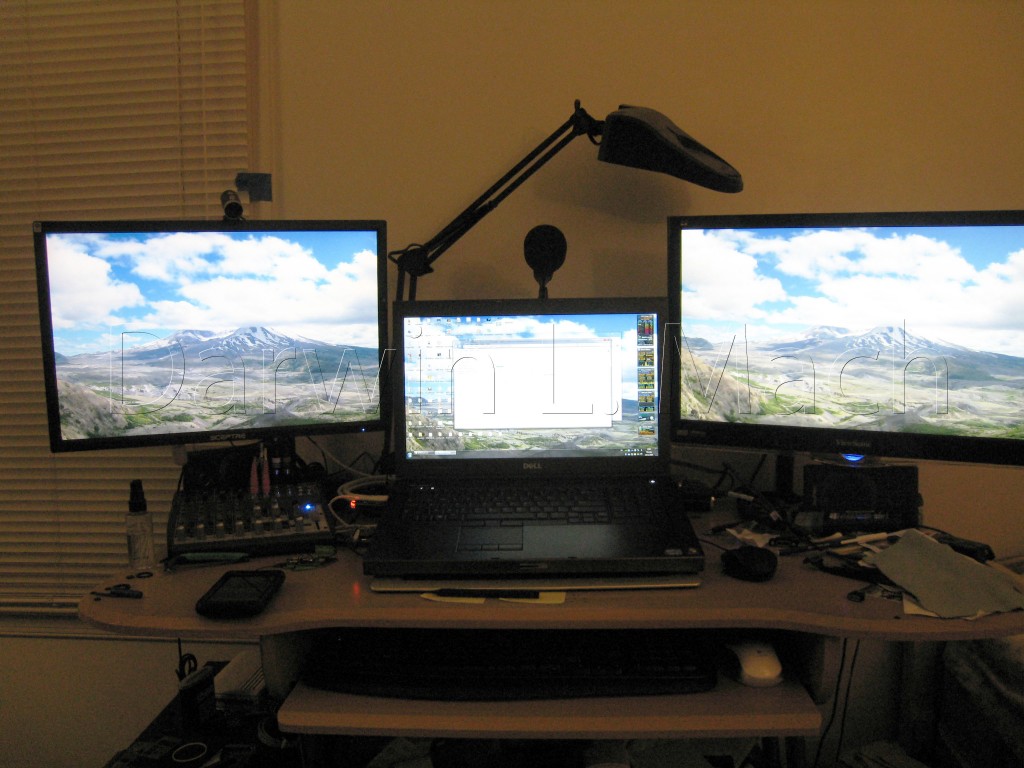
To wrap it up, I’ll leave you with another interesting tip: because of nVidia Optimus, the M6600 supports 3 screens (1 internal, 2 external) for sure. The Intel integrated graphics on the CPU drives the internal display and the VGA port and the dedicated GPU drives the DisplayPort and HDMI ports. Apps are selectively processed on either the dedicated GPU or the integrated chip (as determined by drivers) and then passed to the display (see nVidia’s website on how Optimus technology works). Because the Intel GPU is driving the VGA port, I have reason to believe that a 4th monitor can be added, but I don’t have the resources or the space to test this out.
30 replies on “Dell Precision M6600 vs M6400 Hardware (Overview & Disassembly)”
Great post man! Now I need to do a similar M6500 post!
Also, thank you for posting the info about the M6600 driving three displays using NVIIDIA Optimus (I previously only knew of the M6500 w/ATI eyefinity for 3 monitors). If you ever get verification of 4 displays that would be awesome 🙂
very nice post, helped me buying one M6600 last week. The computer is super fast, however i was trying to replace the optical drive to a 500hdd, i have all necessary caddy for the drive, but when boot the computer does not turn on. i guess there is i have to adjust bios, which i do not know how or where to look at. Do you have any idea that will work. thanks?
Definitely look @ the BIOS settings, if one drive doesn’t work when selected, try the other as the boot drive. The BIOS (uh, I mean EFI ;)) is buggy and and won’t necessarily display the hard disk corresponding to the correct boot option.
Are you runnig Win 7? its my understanding that Optimus can only run with that OS. My company is still stuck in XP world but I still have a need for three Monitors (3D cad) is there any way to make this work on XP 32 bit?
M6600
Quatro 3000M
16G RAM
Core i7 vpro
Thanks,
Nick
Sucks to be you 🙁
You have to use Windows 7 to use Optimus, and thus to enable 3 displays.
//EDIT
On second thought, you should really bug your IT department to move to Windows 7, will save them security headaches.
Excellent Post! I have the M6600 with the Quadro 3000M Card in it. I am running Windows 7 with 16GB of RAM, how do I utilize the power of Optimus to run my desktop on a 3rd display?
Have one display connected via HDMI and the other via DisplayPort is what I have currently. You’ll may need an HDMI to DVI adapter and a DisplayPort to DVI/HDMI adapter.
Great Post!
Another interesting question is if it possible to use the M6600 without graphic board only with the internal hd 3000. Did anybody try it? I need to find out urgent.
Thanks, Mark
Mark the hd300o is in the bios tick box to enable disable ie its the optimus.
Note some are having a crash issue after changing and dell are working on the bios upgrade re this.
Also the latest bios has some issues re video display.Notebook forum reports this.
This is the best M6600 post I’ve seen. Thanks!
I’m getting a M6600 with a dual core i7-2620 and 8 GB ram (2*4GB). I’m buying a quad core i7-2720 and 32 GB ram (4*8GB). It seems that if I replace the 2620 with the 2720, and install all 4 8GB rams, it should work. Do I need to do anything special to enable the second pair of RAM slots (the one that’s more difficult to reach)? Do I need to update bios or anything? Thanks.
My experience – (Core i5 to Core i7-2820QM)
Make sure you boot into the BIOS on just the 2 sticks of RAM first after the CPU swap. It make take a few attempts / power cycles. Then once you can get into the BIOS and verify that the new CPU info is showing, you can install the other 2 “internal” RAM sticks.
Let me know how it goes – I hope to be able to welcome you to the 32GB of RAM club 🙂
// EDIT
Oh, and I always try to stay on the latest BIOS revisions for these precision laptops – their first versions are VERY BAD so if you can update it, do so ahead of time.
Hi Darwin, thank you very much for your prompt reply. Yes, I’ll update bios once I get the laptop (hopefully tomorrow) to A6 (as suggested in your other post). Will try to follow your footprints to install the 32 GB RAMS (which were ordered but have not been delivered yet).
A07 is the latest right, fyi.
the newest bios is A08 release date 02/12/0012
Hi Darwin, I installed the RAM an new CPU and they both worked. Thanks again for your useful tips.
Didn’t see this reply showing up, so I entered another one… Never mind.
Got the CPU and RAM working. Thanks again Darwn!
Hi my name is Tony if you guy’s don’t mind i would like to hang with you for a while learn a few more things see i have a m6600 loaded minus the Ram and two 6500’s i did have 3 of 6600’s but cost of doing business had to sell them with regret.anyway hope to pick up some useful things from you guy’s
the newest bios is A08 release date 02/12/0011
I s bios A08 on the dell site i can only finf A07.
Regards
Also idel temps under 40 deg c furmark on the 3000M is 68 deg c max.
The fastest and coolest and sadly the most expensive laptop i have had.
Well done to dell.
post back re A08 ta v m
Hey guys, the newest BIOS is A09, available from the Dell website. It fixes another round of BSODs. I will write about it later.
nice, very complete post Darwin, more then i could dream for!
I may be able to get my hands on a similar laptop…
I was wondering about the 3 screen setup.
As you mentioned, rendering with optimus is done selectively on either the dedicated GPU or the integrated.
Is this optimus mechanism still in place when running 3 screens?
Does the nvidia card in that case do all the rendering for the 2 external screens, and, occasionally as well for the main laptop screen if a 3D program is running?
i’m not sure if you can answer this, but it would be a key point in making my choice… (i wouldn’t be able to run my program with the limited 3D abilities of the intel integrated gpu…)
thanx in advance!
Yes, it is still auto-selected across all 3 screens. Truthfully the external screens automatically turn on the nVidia card and uses that to drive them.
thanx for your quick response! i know what to do now 😉
I have the M6600 with an i7 and 16 gb of ram with the M3000 and you can run a 4th monitor with the vga port and it runs on the intel
Thanks! I recently confirmed the same too… though I did not have the time to update the post. This seems to work with any Optimus solution because my work laptop with an NVS 4200M can do the same.
Would greatly appreciate your input on wide blue vertical lines (have pic) on an m6600 display. My research thus far indicates might be jumper on motherboard. Will try an external display when I get the machine, but have to install HD & OS first…one of those eBay fixer-uppers. Any other areas to check? Much obliged.
m8900 ATI FirePro 2GB in use on this notebook
hi friend,
I have a question about the Dell Precision M6400.
In the pictures that you make, I see now empty places in my laptop.
It says: WWAN and FCM. Do you know what this names means ??
And wich Parts do I need for this empty places.
Can you help me please ?
Best regards,
M. Kaplan
Please help me find on Dell M6600 motherboard the bios chip.
Thanks